A powerful holographic experience

HoloLens a new approach

In the past few years, Microsoft has undergone significant transformations. One of their noteworthy investments has been in the development of HoloLens, formerly known as Project Baraboo, ushering in a new era of technology. HoloLens is a pair of smart glasses meticulously designed and crafted by Microsoft, operating on the Windows 10 operating system. Equipped with a cutting-edge array of sensors, this device seamlessly integrates advanced technology into your surroundings.

However, it’s worth noting that HoloLens comes with a relatively high price tag. The development edition is priced at $3,000, while the commercial suite tailored for business applications costs $5,000. Microsoft has announced its plans to launch a new iteration of HoloLens in the first quarter of 2019. This next-generation device is expected to feature a significant reduction in price and an expanded field of view, making it even more accessible and versatile for users.

Here are some indicative features of HoloLens:

CPU –     Intel 32-bit (1GHz)
Memory – 2 GB RAM, 1 GB HPU RAM
Storage – 64 GB (flash memory)
Display – 2.3 megapixel widescreen stereoscopic head-mounted display
Sound – Spatial sound technology
Input – Inertial measurement unit (Accelerometer, gyroscope, and magnetometer)
Camera – 2.4 MP
Weight – 579 g (1.28 lb)

My Holographic experience

img_4551.jpgWorking with the HoloLens device over the past year was an immensely rewarding experience. It’s built upon the foundation of two cutting-edge technologies: spatial mapping and spatial sound. These technologies combine to create a truly immersive and lifelike augmented reality environment.

Spatial mapping is a game-changer as it seamlessly blends the real world with the virtual, resulting in holograms that appear strikingly realistic. This merging of physical and digital spaces opens up a world of possibilities for various applications and industries.

Spatial sound, on the other hand, takes audio to the next level by offering a 3D sound simulation experience. This means that sounds are not only heard but also perceived in terms of direction, distance, and the environment. It adds another layer of immersion and interaction to the HoloLens experience.

Certainly, working with HoloLens presented its fair share of challenges, mainly because it’s a relatively new tool, and much of the development had to be done from the ground up. However, the Microsoft libraries provided by the Mixed Reality Toolkit (commonly known as HoloToolkit) were invaluable in overcoming these hurdles. They served as a robust resource, streamlining the development process and making it easier to harness the full potential of the HoloLens technology.

Despite the challenges, the opportunities and innovations that HoloLens brings to the table make it an exciting platform for developers like myself. It opens doors to new possibilities and applications that can revolutionize industries and enhance user experiences in remarkable ways.
Read More »

Load and save data in files on HoloLens device (txt, xml)

In this tutorial, I will guide you through the process of saving and loading data from both text and XML files. The data we’ll be storing consists of three-dimensional points within the mixed reality environment, which you can add to a list using a gesture event, such as air tapping.

Include the ‘Camera’ GameObject with gaze functionality, as well as support for air tap gestures, as described in the guide. “Gaze and Gestures on HoloLens“.

crud.png

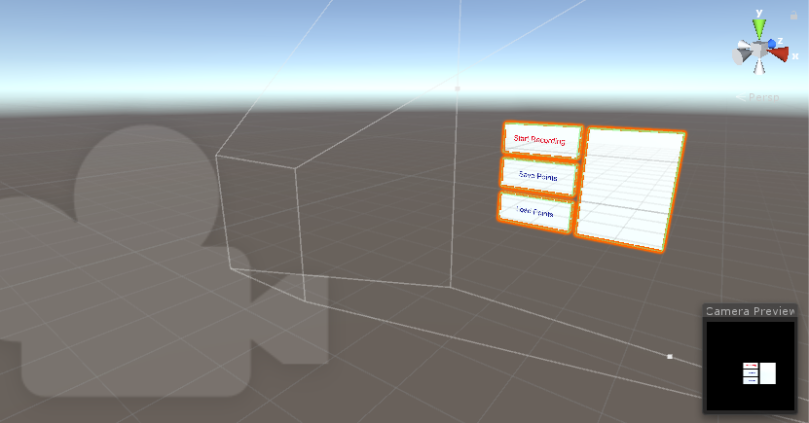
Create three GameObjects equipped with Box Colliders to serve as buttons. The ‘Start Recording’ button allows you to initiate the recording of new three-dimensional points in the space using an air tap gesture. The ‘Save Points’ button enables you to save the recorded points to both text and XML files, while the ‘Load Points’ button lets you load points from text and XML files. Each of these GameObjects should have a script attached to handle the ‘OnSelect’ event.

OnSelectSave.cs file

    void OnSelect()
    {
        #if WINDOWS_UWP
        CRUDManager.Instance.SavePins();
        #endif
    }

Read More »

Take and display photos and videos on HoloLens

Microsoft HoloLens is equipped with a diverse array of sensors, making it an incredibly powerful tool. Worn on the head, it offers a unique perspective of the surroundings. This guide demonstrates how to capture photos using HoloLens and project them onto holographic surfaces, as well as how to record and playback videos.

captureinspector.PNG
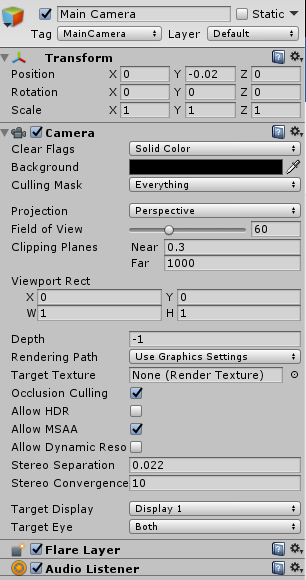
Begin by creating a new scene named ‘Capture-Play-Photo-Video.’ It’s essential to configure the scene’s Camera with a perspective projection. Ensure that you are positioned correctly, as illustrated in the image: Position (0, -0.02, 0), Rotation (0, 0, 0), and Scale (1, 1, 1). It’s worth noting that the camera’s placement serves as the reference point for initializing other objects in the spatial environment.

CameraInspector

Add two new GameObjects in the Unity scene, naming them ‘DisplayPhoto’ and ‘PlayVideo.’ Apply the following transformations to these objects:Read More »

Using of Microsoft Cognitive Services Computer Vision and Face API – (OCR & Faces) on HoloLens

In recent years, there have been significant advancements in the field of neural networks and Artificial Intelligence (AI). Microsoft, too, has developed a suite of Cognitive Services consisting of machine learning algorithms designed to address challenges in the realm of AI. These Cognitive Services APIs are organized into five distinct categories:

  • Vision—analyze images and videos for content and other useful information.
  • Speech—tools to improve speech recognition and identify the speaker.
  • Language—understanding sentences and intent rather than just words.
  • Knowledge—tracks down research from scientific journals for you.
  • Search—applies machine learning to web searches.

In this tutorial, we will explore the utilization of identification with the Face API. Additionally, you can find a supplementary GitHub guide for character recognition using the Computer Vision API at the end of this article.

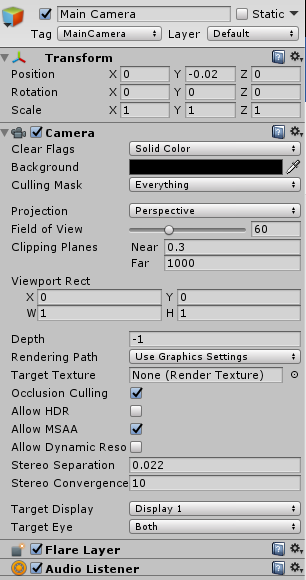
It’s crucial to configure the camera in the scene with a perspective projection and ensure it’s positioned correctly, as depicted in the image. Set the camera’s attributes to: Position (0, -0.02, 0), Rotation (0, 0, 0), and Scale (1, 1, 1). Essentially, the location you select for the camera will serve as the reference point for initializing other objects in the 3D space.

CameraInspector

You’ll require two GameObjects. The first one, named ‘PhotoCaptureManager,’ will house the necessary scripts and handle the task of capturing photos from the HoloLens device. It will also be responsible for sending these photos to Azure Cognitive Services for processing.The second GameObject, named ‘AudioSource,’ will contain Audio Source components for playing back voice output generated from text-to-speech implementation. For instance, it can be used to convey phrases like ‘He is approximately 26 years old and appears to be happy.

Before you begin coding, it’s essential to create an Azure account and save the service key for use in your code. You can select the billing package that suits your needs. The F0 free package allows you to make up to 20 calls per minute and up to 30,000 calls per month.

Read More »

Calculate distance HoloLens to object and object to object

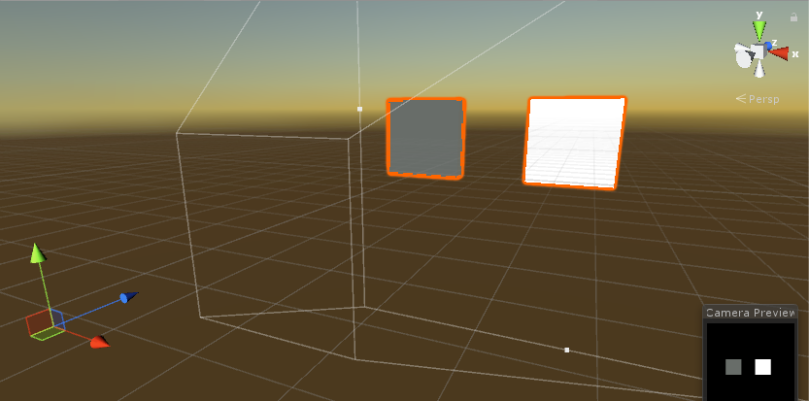
This guide consists of two scenes. In the first scene, you will calculate the distance between the HoloLens and any surface in the real world. In the second scene, you will perform calculations that summarize distances from multiple three-dimensional points.

calculationdistance.png

The calculation of the distance between the HoloLens and any three-dimensional point in space is explained through the following method. To recognize surfaces in the real-world environment, you can utilize the spatial mapping component from HoloToolkit. These two points represent the location of the HoloLens and the position recognized by the HoloLens as a surface through gaze.

GlobalCursor.cs

void Update()
    {
        var headPosition = Camera.main.transform.position;
        var gazeDirection = Camera.main.transform.forward;
        
        var gazePosition = GameObject.Find("GlobalCursor").transform.position;

        RaycastHit hitInfo;

        if (Physics.Raycast(headPosition, gazeDirection, out hitInfo))
        {
            meshRenderer.enabled = true;

            this.transform.position = hitInfo.point;
            
            this.transform.rotation = Quaternion.FromToRotation(Vector3.up, hitInfo.normal);

            //Display distance (Hololens - Cursor)
            float distance = Vector3.Distance(headPosition, gazePosition);
            TextMessage.Instance.ChangeTextMessage(string.Format("Distance: {0}", distance >= 1.0f ? distance.ToString("####0.0") + "m" : distance.ToString("0.00") + "cm" ));
        }
        else
        {
            meshRenderer.enabled = false;
            TextMessage.Instance.ChangeTextMessage(string.Empty);
        }
    }
}

Read More »

Gaze and gestures in the HoloLens

Gaze serves as a fundamental method of targeting in the realm of mixed reality. Through the gaze cursor, users can direct their attention in both the physical world (especially when spatial mapping is employed) and interact with holograms. Complementing this, users can engage with their environment through gestures. The key avenues for user actions encompass gestures, motion controllers, and voice commands. Among these, the principal gestures include the air tap, double air tap, hold, and drag; moreover, users also have the option to devise custom gestures to suit their specific needs.

This guide is designed to help you build a HoloLens application from the ground up, providing hands-on experience with the gaze cursor and various gestures. Throughout the development process, we will leverage the Unity platform for building the application.By following this guide, you will gain practical knowledge and proficiency in utilizing the gaze cursor and implementing gesture interactions within your HoloLens applications. This hands-on approach will empower you to create immersive mixed reality experiences.

Create a new Unity project and add a scene named ‘GazeGesture’ to the project. Initially, you need to make some adjustments to enable and build the HoloLens application successfully.Navigate to ‘Edit’ -> ‘Project Settings’ -> ‘Player.’ On the ‘XR Settings’ tab, check the ‘Virtual Reality Supported’ checkbox, and add ‘Windows Virtual Reality’ to the list.To configure the project, go to ‘File’ -> ‘Build Settings.’ In the ‘Universal Windows Platform’ tab, select ‘HoloLens’ as the device and ‘D3D’ as the build type.

It’s crucial to configure the camera settings in your scene correctly. Set the camera projection to ‘Perspective’ and position it as shown in the accompanying picture. The camera should be situated at coordinates (0, -0.02, 0) with a rotation of (0, 0, 0) and a scale of (1, 1, 1). This camera’s placement determines the point from which all other objects in your virtual space will be initialized.

CameraInspector
To create the cursor, begin by adding a new GameObject named ‘GlobalCursor.’ Set its scale to (1, 0.5, 1). Next, create another GameObject, naming it ‘GlobalCursorMesh,’ and make it a child of the ‘GlobalCursor’ GameObject. Inside the ‘GlobalCursorMesh’ GameObject, add the ‘Mesh’ and ‘MeshRenderer’ components. You can conveniently select the ‘Mesh’ component from the Microsoft Windows Mixed Reality Toolkit.
mixedrealitytoolkit.png

Read More »

Create a background video for the HTML site with the use of the Azure Storage Account

Using background videos on websites has become quite common nowadays. I recently discovered the capabilities available within the Azure Storage Account, and I’ve come to realize that embedding a background video on a website through a Storage Account is a straightforward process.

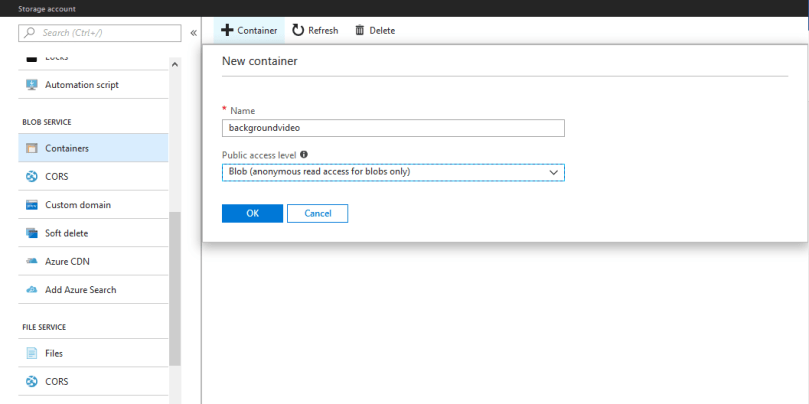
To get started, you should create a container within your Azure Storage Account. After creating the container, set the public access level option to “Blob (anonymous read access for blob only).” This configuration will allow you to make the video content accessible for embedding on your website.

blob1

After uploading the video you intend to use, navigate to the properties of the uploaded video file within your Azure Storage Account. From there, you can obtain the video URL, which will be inserted into your website’s code to embed the background video.

blob2

blob3Read More »

Guide to drop documents in Azure documentDB (new CosmosDB)

A few months ago, I took on the responsibility of managing a non-relational DocumentDB database, which has since been updated to CosmosDB, hosted on Azure. During this journey, I encountered challenges, particularly when it came to deleting specific records. It became evident that understanding how partitions work and selecting the correct partition by ID played a pivotal role in overcoming these obstacles.

To facilitate this process, I developed a Windows console application sample in C#. This application serves to collect document IDs based on a query and subsequently deletes the documents associated with those IDs. This tool has proven to be invaluable in efficiently managing and maintaining our database, streamlining the deletion process for optimal database performance.

Initially we install the libraries Microsoft.Azure.DocumentDB and Newtonsoft.Json.

libraries.png

To establish a connection between the DocumentDB database and the Windows console application, you will require the necessary credentials, including the URI and primary key. These credentials can be found in the “keys” tab within the Azure portal.

Untitled-1

Next, you’ll need to initialize the DocumentDB URI, primary key, as well as specify the collection and database names.

private const string connectionEndpointUri ="https://dropdocuments.documents.azure.com:443/";
private const string primaryKey = "Kl9XbLDeSPjcmoJra7tKkHblfamvhmxFdzcw7LN3Pl44ENCdBYHax6krgmqGgqfpRbUEj73Rml0YAOR2ALJBZg==";
private static string databaseId = @"DatabaseName";
private static string collectionId = @"CollectionName";
private Uri collectionLink = UriFactory.CreateDocumentCollectionUri(databaseId, collectionId);

Read More »